Step-by-Step Guide to Using a Cordless Track Saw for Flawless Cabinet Making
By Acmetoolsdiscount | Published: 2026-06-05
Category: How-to Guides
Learn how to achieve precision cuts in cabinet making with a cordless track saw. This guide covers setup, technique, and pro tips for flawless results.
Cabinet making demands precision—every cut must be straight, clean, and repeatable. While table saws and circular saws have their place, a cordless track saw offers unmatched portability and accuracy, especially for large panels and on-site work. In this guide, we'll walk you through every step of using a cordless track saw for cabinet making, from setup to advanced techniques, so you can produce professional-grade results every time.
Why a Cordless Track Saw Is Essential for Cabinet Making
A cordless track saw combines the portability of a circular saw with the precision of a table saw. Its guided rail system eliminates the need for measuring and marking cut lines, reducing errors and waste. For cabinet makers, this means you can break down sheet goods like plywood and MDF with zero chip-out on both sides, thanks to the splinter guard and scoring feature. Plus, with battery power, you can work anywhere without being tethered to an outlet—ideal for job sites or workshops with limited space.
Key Advantages Over Traditional Saws
- Accuracy: The track ensures perfectly straight cuts, even for long panels up to 8 feet.
- Portability: No need to haul heavy materials to a stationary saw.
- Clean cuts: Anti-splinter inserts and zero-clearance tracks prevent tear-out on veneered plywood.
- Versatility: Adjustable bevel and depth settings allow for angled cuts and dado work.
Choosing the Right Cordless Track Saw for Cabinet Making
When selecting a cordless track saw, look for one with a powerful brushless motor, variable speed control, and a reliable battery platform. The M18 FUEL 18V Lithium-Ion Cordless Brushless 1/2 in. Router (Tool-Only) is a versatile companion for edge routing after cuts, but for the saw itself, consider a model that integrates with the same battery system. While we focus on the technique here, the M18 platform offers excellent runtime and power for demanding tasks.
Step 1: Prepare Your Workspace and Materials
Before making any cuts, set up a stable work surface. Use a pair of sawhorses or a workbench that can support the full panel. Lay the material flat and ensure it's free of debris. Measure and mark your cut line lightly with a pencil—though the track will guide the saw, having a reference point helps.
Gather Essential Accessories
- Track (rail): Typically 55 or 110 inches long. Connect multiple tracks for longer cuts.
- Clamps: Quick-release clamps hold the track securely to the material.
- Anti-splinter strip: Attach it to the track's cutting edge for chip-free cuts.
- Blade: Use a fine-tooth blade (40-60 teeth) for clean cuts in plywood and melamine.
Step 2: Set Up the Track and Align the Saw
Place the track on your material parallel to the cut line. Most tracks have a rubber grip strip on the bottom to prevent slipping. Align the track's edge with your cut line, then clamp both ends to the material. Ensure the track overhangs the material slightly at both ends to allow the saw to enter and exit smoothly.
Attach the Saw to the Track
Slide the saw's base plate into the track's groove. Most track saws have a lever that locks the saw in place—engage it to prevent accidental dislodging. Set the depth of cut slightly deeper than your material thickness (about 1/8 inch). For bevel cuts, adjust the bevel angle (usually 0-45 degrees) and lock it in place.
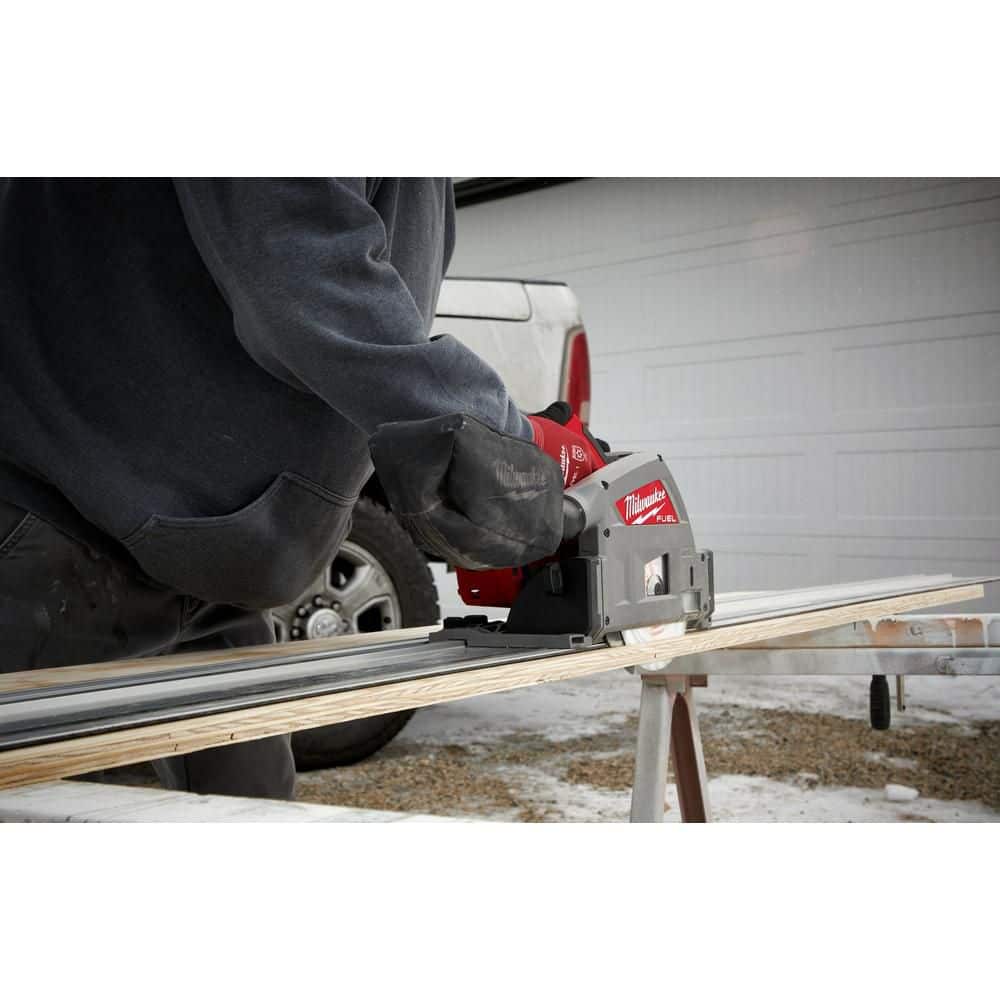
Step 3: Make the Cut with Proper Technique
Start the saw and let the blade reach full speed before engaging the material. Push the saw smoothly along the track at a steady pace—don't force it. Let the blade do the work. Keep your hands clear of the blade path and use the track's handle if available. For long cuts, maintain a consistent speed to avoid burn marks.
Pro Tips for Flawless Cuts
- Use a scoring pass: For ultra-clean cuts on veneered plywood, make a shallow pass (1/8 inch deep) first, then a full-depth pass. This prevents chip-out.
- Support the offcut: When cutting, the waste piece may fall and cause tear-out. Place a scrap piece underneath or have an assistant hold the offcut.
- Check battery level: A dying battery can affect cutting speed. Keep a spare battery charged.
Step 4: Finish and Assemble Your Cabinet Parts
After cutting all panels, edges may need light sanding or routing. Use a router with a flush-trim bit to smooth edges, or a block plane for fine adjustments. For joining panels, consider using dowels, biscuits, or a pocket hole jig. The clean edges from the track saw make glue-ups easier and stronger.
Common Cabinet Cuts You Can Make
| Cut Type | Description | Tip |
|---|---|---|
| Rip cuts | Cutting along the length of a panel | Use a long track or multiple tracks joined |
| Crosscuts | Cutting across the width | Use a square attachment for 90-degree accuracy |
| Bevel cuts | Angled cuts for face frames or crown molding | Set bevel angle and clamp the track firmly |
| Dado cuts | Grooves for shelf supports | Make multiple passes with a standard blade, then clean with a chisel |
Maintaining Your Track Saw for Longevity
To keep your saw performing at its best, clean the track regularly with a dry cloth to remove sawdust and resin. Check the blade for dullness—replace it when cuts become rough or require extra force. Lubricate the track's groove with a dry lubricant to ensure smooth movement. Store the track in a protective case or hang it to prevent warping.
Integrating Other M18 Tools in Your Cabinet Making Workflow
A cordless track saw is just one piece of the puzzle. For drilling pocket holes or assembling cabinets, the M18 FUEL GEN II 18-Volt 18-Gauge Lithium-Ion Brushless Cordless Brad Nailer Kit is perfect for attaching face frames and trim without splitting the wood. And for cutting out sink cutouts or irregular shapes, a jigsaw from the same battery platform can handle curves with ease.
Common Mistakes to Avoid
- Skipping clamps: The track can shift if not clamped, ruining your cut.
- Ignoring battery health: A low battery can cause the saw to stall mid-cut, leading to burn marks.
- Not using a dust collection system: Track saws produce fine dust; attach a vacuum for a cleaner workspace and better visibility.
- Cutting without a track: Freehand cutting defeats the purpose of a track saw—always use the rail for precision.
Final Thoughts
Mastering a cordless track saw transforms your cabinet making from average to exceptional. With practice, you'll be able to produce joints that fit perfectly, edges that need minimal sanding, and projects that look professional. Remember, the key is preparation—take time to align the track, choose the right blade, and support your material properly.
Ready to take your cabinet making to the next level? Explore the M18 FUEL 18V Lithium-Ion Cordless Brushless 1/2 in. Router (Tool-Only) to add edge routing and joinery capabilities to your workflow. With the right tools and techniques, you'll build cabinets that last a lifetime.