How to Safely Operate a Knockout Tool for Electrical Conduit: A Step-by-Step Guide
By Acmetoolsdiscount | Published: 2026-06-01
Category: How-to Guides
Master safe knockout tool operation for electrical conduit with this step-by-step guide. Learn hydraulic and manual methods, safety tips, and tool recommendations from Acmetoolsdiscount.
When running electrical conduit, few tasks are as critical—or as potentially hazardous—as cutting clean, accurate holes in junction boxes, panelboards, and enclosures. A knockout tool, also known as a knockout punch kit, allows electricians and tradespeople to create precise openings for conduit fittings, connectors, and cables without resorting to unsafe methods like hammering or drilling oversized holes. Whether you're working on a commercial job site or a residential panel upgrade, understanding how to use a knockout tool safely and effectively is essential for both quality results and personal safety.
In this comprehensive guide, we'll walk you through everything you need to know about knockout tool operation, from selecting the right tool for the job to step-by-step procedures for hydraulic and manual systems. We'll also highlight key safety precautions and recommend top-rated products available at Acmetoolsdiscount, including the powerful M18 18-Volt Lithium-Ion Cordless 18-Gauge Double Cut Metal Shear (Tool-Only) for cutting thin metal before punching, and the M18 FUEL 18V Lithium-Ion Brushless Cordless Metal Cutting 5-3/8 in. Circular Saw (Tool-Only) w/ Metal Saw Blade for making quick cuts on heavier gauge material.
What Is a Knockout Tool and Why Is It Used?
A knockout tool is a specialized device designed to punch clean, round holes in sheet metal, stainless steel, plastic, or fiberglass enclosures. The term "knockout" comes from the scored circles often pre-stamped in electrical enclosures that can be knocked out with a hammer and screwdriver. However, for custom hole sizes or thicker materials, a knockout punch kit is required. The tool typically consists of a punch (the male die), a die (the female receiving piece), and a driver mechanism—either manual (ratcheting) or hydraulic (battery-powered or hand-pumped).
Electricians use knockout tools to create holes for conduit connectors, cable glands, switches, outlets, and other electrical devices. Using a knockout tool ensures a burr-free, round hole that meets code requirements and prevents damage to wire insulation. Attempting to create such holes without a proper tool—using a drill bit, jigsaw, or reciprocating saw—can result in jagged edges, metal shavings, and increased risk of injury.
Types of Knockout Tools: Manual vs. Hydraulic
Choosing the right knockout tool depends on the material thickness, hole size, and frequency of use. Here's a breakdown of the two main types:
Manual (Ratcheting) Knockout Tools
Manual knockout punches use a ratcheting mechanism to draw the punch through the material. They are portable, require no power source, and are ideal for smaller holes (up to about 2 inches) in thin-gauge metal (up to 10 gauge). They are slower than hydraulic tools but offer excellent control for precise work. Manual kits are often more affordable and lighter, making them suitable for maintenance work or smaller job sites.
Hydraulic Knockout Tools
Hydraulic knockout punch kits use fluid pressure to generate tremendous force, allowing clean cuts through thicker materials (up to 1/4 inch or more) and larger holes (up to 4 inches or greater). Hydraulic systems can be operated with a hand pump or powered by a cordless battery, such as Milwaukee's M18 Force Logic system. The M18 Force Logic knockout tool is a game-changer because it combines the portability of a cordless tool with the power of hydraulics, enabling one-handed operation and reducing user fatigue. When working with heavy-duty enclosures or production-level jobs, hydraulic knockout tools are the preferred choice.
For preparatory work—like trimming metal before punching or cleaning up edges—the M18 18-Volt Lithium-Ion Cordless 18-Gauge Double Cut Metal Shear (Tool-Only) is an excellent companion tool. Its double-cut design leaves a smooth, burr-free edge, ideal for removing excess material or shaping a knockout area.
Step-by-Step Guide to Safely Operate a Knockout Tool
Follow these steps to ensure safe and effective knockout tool operation. Always refer to your specific tool's manual for exact instructions.
Step 1: Gather the Right Tools and PPE
Before starting, assemble the following:
- Knockout punch kit (manual or hydraulic) with the correct punch and die for your hole size
- Drill and drill bit (for pilot hole)
- Center punch (optional but recommended for marking)
- Deburring tool or file
- Personal protective equipment (PPE): safety glasses, heavy-duty gloves, hearing protection (for hydraulic tools), and long sleeves to protect against sharp edges
- Work gloves with good grip to handle metal pieces
Step 2: Mark and Drill a Pilot Hole
Accurately mark the center of the desired knockout location on the enclosure. Use a center punch to create a small dimple, which prevents the drill bit from wandering. Select a drill bit that matches the pilot hole size recommended by the knockout kit manufacturer (typically 1/4 to 3/8 inch). Drill the pilot hole straight and perpendicular to the surface. For thicker materials, use cutting oil to prolong bit life and reduce heat.
Step 3: Assemble the Knockout Tool
Insert the punch (the male threaded rod) through the pilot hole from the front side of the enclosure. On the back side, thread the die (the female receiving piece) onto the punch. Ensure the punch and die are properly aligned—the punch should be centered in the die's recess. For hydraulic tools, attach the hydraulic ram or pump unit according to the manufacturer's instructions.
Step 4: Apply Pressure and Punch the Hole
For manual ratcheting tools, use the ratchet handle to slowly tighten the punch, turning it clockwise. Continue until the punch shears through the material with a distinct "pop." Do not force or over-tighten—if resistance is excessive, check alignment or consider a hydraulic tool. For hydraulic tools, operate the pump lever (manual) or press the trigger (battery-powered) to apply steady, even pressure. Watch for the punch to break through completely. On battery-powered systems like M18 Force Logic, the tool automatically stops when the punch is fully through, reducing the risk of over-travel.
Step 5: Remove the Tool and Deburr the Hole
After the punch breaks through, reverse the ratchet handle or release hydraulic pressure to retract the punch. Slide the punch out of the hole, and the die will fall away. Use a deburring tool or file to smooth any sharp edges around the hole. This step is critical to prevent damage to wire insulation during conduit installation.
Safety Tips for Knockout Tool Operation
Using a knockout tool involves high forces and sharp metal edges. Follow these safety guidelines:
- Always wear safety glasses: Metal shavings and debris can fly during punching.
- Use heavy-duty gloves: The edges of newly punched holes are razor-sharp.
- Secure the workpiece: Clamp the enclosure or panel to a stable surface to prevent movement.
- Never force the tool: If the punch binds, stop and check alignment. Forcing can cause tool failure or injury.
- Inspect the tool regularly: Look for worn or cracked dies, bent punches, or hydraulic leaks. Replace damaged components immediately.
- Keep hands clear: During punching, keep fingers away from the punch area. The tool can suddenly break through with force.
- Follow manufacturer ratings: Do not exceed the maximum material thickness or hole size specified for your kit.
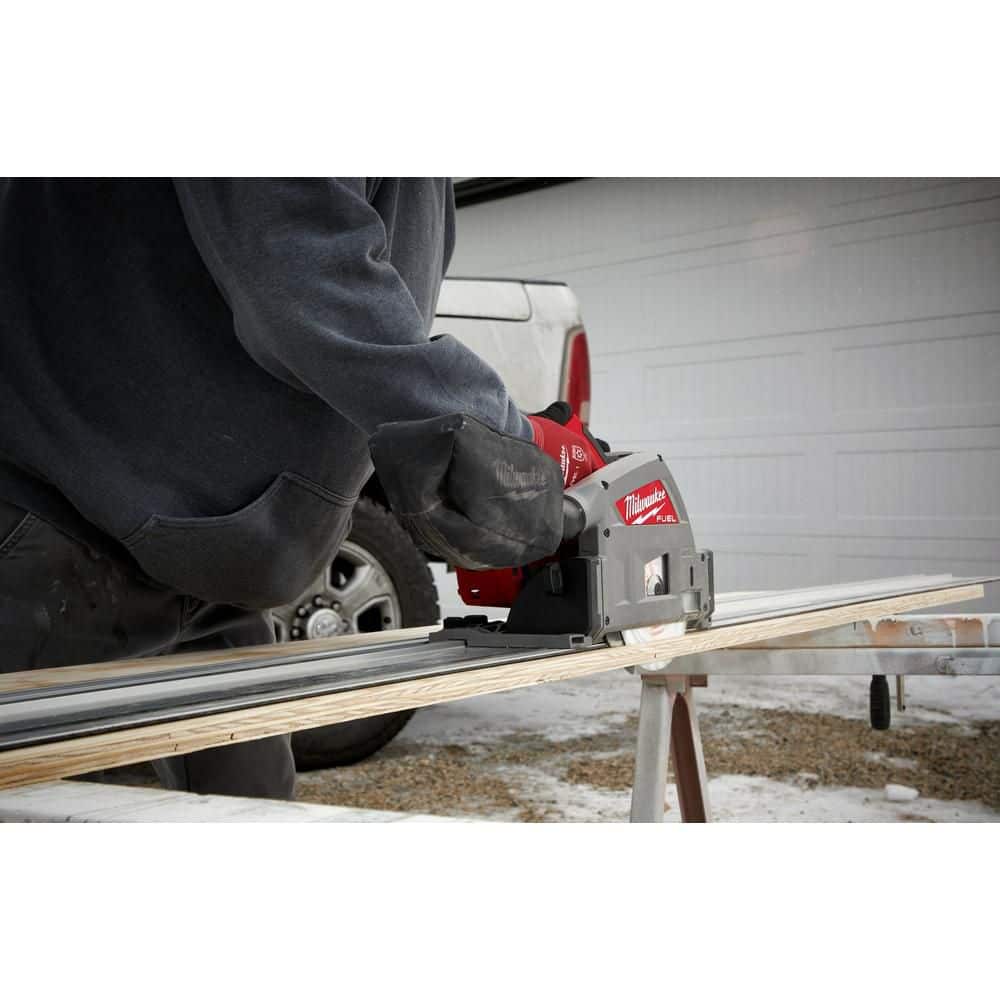
For cutting metal before or after punching, consider the M18 FUEL 18V Lithium-Ion Brushless Cordless Metal Cutting 5-3/8 in. Circular Saw (Tool-Only) w/ Metal Saw Blade. Its brushless motor and specialized blade deliver clean cuts with minimal sparks, making it a safe and efficient tool for preparing enclosures or cutting conduit to length.
Common Mistakes to Avoid
Even experienced electricians can make errors. Watch out for these common pitfalls:
- Using the wrong size pilot hole: A too-small pilot hole can cause the punch to bind; a too-large hole weakens the die grip.
- Punching on uneven surfaces: Curved or irregular surfaces can cause misalignment. Use a flat backing plate if necessary.
- Ignoring material type: Stainless steel requires slower punching speeds and proper lubrication. Not all kits are rated for stainless.
- Skipping cleanup: Metal burrs can cut wires and cause shorts. Always deburr thoroughly.
- Over-tightening manual tools: This can strip threads or break the punch. Use steady, consistent pressure.
Maintenance and Care for Your Knockout Tool
To extend the life of your knockout punch kit, clean it after each use. Wipe away metal shavings and oil moving parts lightly. Store punches and dies in a dry case to prevent rust. For hydraulic tools, check hydraulic fluid levels periodically and inspect hoses for cracks. Battery-powered tools like the M18 Force Logic should have their batteries stored at room temperature and charged regularly to maintain performance.
When to Use a Knockout Tool vs. Other Methods
While knockout tools are ideal for round holes in flat metal, other situations may call for different tools:
| Application | Recommended Tool | Why |
|---|---|---|
| Round hole in thin sheet metal (up to 14 ga) | Manual knockout punch | Fast, clean, portable |
| Round hole in thick panel (10 ga or more) | Hydraulic knockout tool | Higher force needed |
| Irregular shape or cutout | Jigsaw or metal shear | More flexibility |
| Small hole for wire (1/2 inch or less) | Step drill bit | Quick, no special tool needed |
For trimming conduit or removing excess metal near a knockout, a metal shear like the M18 Double Cut Shear is fast and safe. For longer cuts, a metal-cutting circular saw offers speed and precision.
Final Thoughts: Invest in Quality for Safety and Efficiency
Operating a knockout tool correctly is a skill every electrician and tradesperson should master. By following the steps above—marking accurately, using proper PPE, applying steady pressure, and deburring thoroughly—you can create professional-grade holes quickly and safely. Whether you choose a manual ratcheting kit for occasional use or a cordless hydraulic system like Milwaukee's M18 Force Logic for daily heavy-duty work, the right tool makes all the difference.
At Acmetoolsdiscount, we stock a wide selection of knockout tools, punches, dies, and supporting equipment. Explore our collection to find the perfect kit for your next electrical project. For a reliable, high-performance option, check out the M18 18-Volt Lithium-Ion Cordless 18-Gauge Double Cut Metal Shear (Tool-Only)—a versatile tool that complements your knockout work by making clean cuts in thin metal. Pair it with a quality knockout punch set, and you'll be ready for any conduit installation job.
Remember: safety first, precision always. Happy punching!