How to Clean and Maintain Your Cordless Hair Clipper: A Step-by-Step Guide for Optimal Performance
By milwaukeetool | Published: 2026-06-26
Category: How-to Guides
Learn how to clean and maintain your cordless hair clipper with this step-by-step guide. Discover blade oiling, battery care, and Milwaukee tool tips for DIY haircuts.
Whether you’re a professional barber or a DIY enthusiast giving yourself a fresh fade at home, a cordless hair clipper is an essential tool that demands regular care. Without proper maintenance, even the best clipper can become dull, noisy, or prone to pulling hair. This comprehensive guide will walk you through how to clean and maintain your cordless hair clipper step by step, covering everything from daily blade cleaning to long-term battery care. By following these tips, you’ll extend the life of your clipper, ensure smooth cuts, and save money on replacements. We’ll also highlight how Milwaukee’s cordless tools and accessories can fit seamlessly into your grooming routine.
Why Regular Maintenance Matters for Your Cordless Hair Clipper
Hair clippers face constant exposure to hair clippings, oils, and products. Over time, debris builds up inside the blade assembly, causing friction, overheating, and reduced cutting efficiency. A well-maintained clipper cuts cleaner, runs quieter, and prevents skin irritation. For cordless models, battery care is equally critical—neglecting the battery can shorten runtime and lead to early failure. Regular cleaning also helps you avoid costly repairs or replacements. Think of it as the same principle behind caring for your other power tools: a little routine attention goes a long way.
Step 1: Gather Your Cleaning Supplies
Before you start, assemble the right tools. Here’s what you’ll need:
- Small brush (often included with the clipper)
- Blade oil (clipper-specific, not general lubricant)
- Isopropyl alcohol (70% or higher) for disinfecting
- Clean, lint-free cloths
- Compressed air (optional, for hard-to-reach areas)
- Small screwdriver (if your clipper has removable blades)
Having a dedicated cleaning kit makes the process faster and more effective. If you don’t have a brush, a clean toothbrush works in a pinch.
Step 2: Remove Hair and Debris After Every Use
This is the most critical step. After each haircut, turn off the clipper and disconnect the battery (if removable). Use the brush to sweep away hair from the blade teeth and the area between the moving blade and stationary blade. Pay special attention to the corners and pivot points. For stubborn clumps, use compressed air to blow out debris. Never use water directly on the clipper body—moisture can damage internal electronics. For cordless clippers that share battery platforms with other tools, like those in the M12 or M18 lines, keeping the battery contacts clean is also important. A dry cloth is sufficient for battery terminals.
Step 3: Disinfect the Blades
Hair clippers can harbor bacteria and fungi, especially if used on multiple people. After cleaning off hair, lightly spray the blades with isopropyl alcohol. Let it sit for 30 seconds, then wipe dry with a cloth. This sanitizes the blades without causing rust. Avoid submerging the clipper head in liquid—alcohol is fine for a quick spray, but prolonged exposure can damage plastic components.
Step 4: Oil the Blades Properly
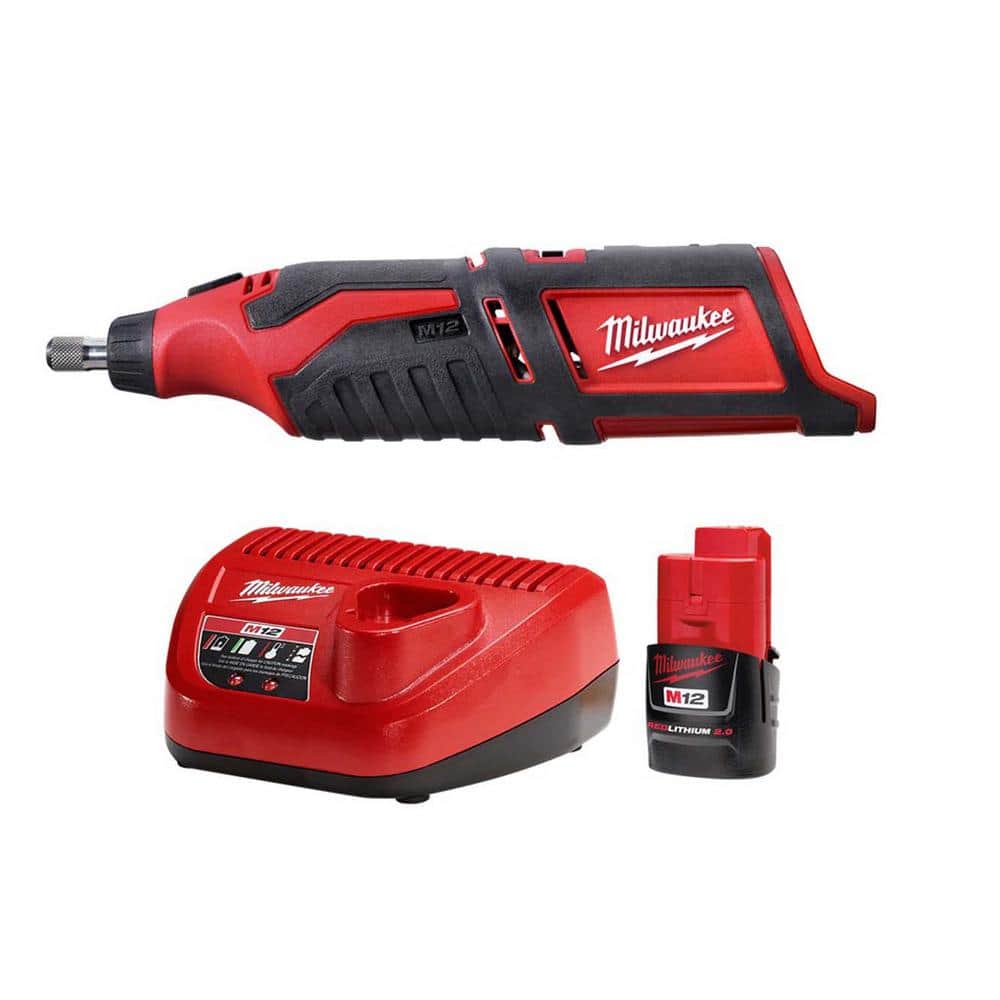
Blade oil reduces friction, prevents overheating, and extends blade life. Apply 1–2 drops of oil directly onto the moving blade teeth, then turn the clipper on for 10–15 seconds to distribute the oil evenly. Wipe away any excess oil with a cloth. Do not over-oil, as it can attract more hair. Use only clipper-specific oil—cooking oil or WD-40 will gum up the blades. This is especially important for precision grooming tools. If you’re working on a projects that require sharp, clean cuts—like trimming hair before applying a bandage or working in tight spaces—a well-oiled clipper is just as reliable as a M12 12V Lithium-Ion Cordless Rotary Tool w/Compact Battery Pack 2.0Ah and Charger Starter Kit for precision tasks around the house.

Step 5: Deep Clean the Blade Assembly (Weekly)
Once a week, remove the blade assembly from the clipper (if your model allows it). Most clippers have a release button or screws. Detach the blades and use a brush to remove all hair from the base. Soak the blades in a shallow dish of isopropyl alcohol for 5–10 minutes to dissolve any built-up grease or product residue. Scrub gently with a toothbrush, rinse with alcohol, and let them air dry completely before reattaching. Re-oil the blades before reassembling. This deep cleaning prevents corrosion and keeps the cutting action smooth.
Step 6: Battery Care for Cordless Clippers
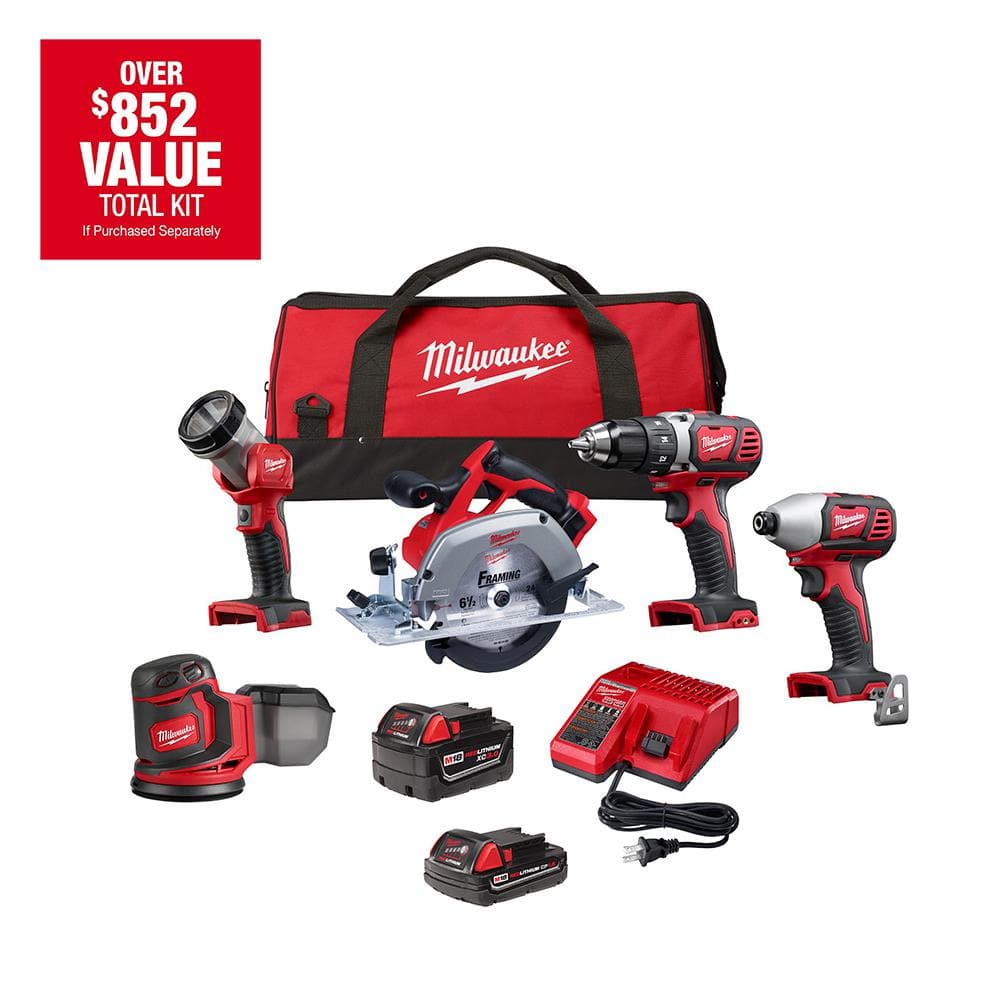
Modern cordless clippers use lithium-ion batteries, which require specific care to maximize lifespan. Avoid fully draining the battery before recharging—partial charges are better. Store the clipper in a cool, dry place, away from direct sunlight or extreme heat. If you don’t use the clipper for more than a month, store the battery at around 50% charge. For clippers that share batteries with other Milwaukee tools, you can take advantage of the platform’s versatility. For example, the M18 18V Lithium-Ion Cordless Combo Kit (5-Tool) with 2-Batteries, Charger and Tool Bag includes high-capacity batteries that can power not only your clipper but also drills, saws, and lights. This interchangeability means you always have a charged battery ready. Always use the manufacturer’s charger to avoid voltage mismatches.
Step 7: Check and Replace Blades When Necessary
Over time, blades will dull. Signs of dull blades include pulling hair, uneven cuts, or increased noise. Most clipper blades can be sharpened or replaced. If you notice nicks in the blade teeth, replace them immediately to prevent injury. When shopping for replacement blades, ensure they are compatible with your clipper model. For heavy-duty grooming tasks, consider using a tool like the BIG HAWG Carbide Hole Saw Kit (9-Piece) with PACKOUT Case for other DIY projects—while it’s not for hair, its carbide construction shows the importance of durable cutting edges in any application.
Step 8: Store Your Clipper Properly
Always store your clipper with the blade guard on to protect the teeth. Keep it in a dry, dust-free environment. If your clipper came with a storage case, use it. Avoid tossing the clipper into a toolbox without protection. For organizing your clipper alongside other grooming tools or small accessories, the PACKOUT 5-Compartment Low-Profile Compact Small Parts Organizer is perfect. It keeps blades, combs, and oils neatly separated and easily accessible. The PACKOUT system integrates with other Milwaukee storage solutions, making it simple to transport everything to your grooming station.
Step 9: Troubleshooting Common Issues
Even with regular care, you may encounter problems. Here’s a quick troubleshooting table:
| Problem | Likely Cause | Solution |
|---|---|---|
| Clipper pulls hair | Dull or misaligned blades | Clean, oil, and align blades; replace if needed |
| Overheating | Lack of oil or debris buildup | Clean and oil thoroughly |
| Battery drains quickly | Aged battery or improper charging | Recondition battery or replace; avoid deep discharges |
| Loud operation | Loose blade screws or worn parts | Tighten screws; lubricate; inspect for damage |
| Clipper won’t turn on | Dead battery or faulty connection | Charge battery; clean contacts; test with another battery |
If issues persist, consult the manufacturer’s manual or contact customer support.
Step 10: Long-Term Storage and Seasonal Maintenance
If you only use your clipper seasonally (e.g., for summer haircuts), prepare it for storage. Clean and oil the blades, charge the battery to about 50%, and store in a cool, dry place. Every three months, re-oil the blades and give the battery a partial charge to maintain cell health. For those who use their clipper frequently, consider a monthly deep clean to keep it in top shape.
Conclusion: Keep Your Clipper Cutting Like New
Regular cleaning and maintenance of your cordless hair clipper are simple habits that pay off in performance, longevity, and hygiene. By following this step-by-step guide—cleaning after each use, oiling weekly, deep cleaning monthly, and caring for your battery—you’ll ensure smooth, precise cuts every time. Don’t forget to store your clipper and accessories properly using a system like Milwaukee’s PACKOUT organizers to keep everything tidy and protected. For a reliable and powerful grooming tool that fits into your existing battery platform, explore the M12 12V Fuel Lithium-Ion Cordless Jig Saw (Tool-Only)—while it’s a jigsaw, its ergonomic design and brushless motor reflect the same quality you can expect from Milwaukee’s grooming tools. Take care of your clipper, and it will take care of your look.